Radio controlled bicycle back light: Difference between revisions
| Line 18: | Line 18: | ||
Also updated the schematic: [[File:Rf achterlicht rev 2,2.pdf]] | Also updated the schematic: [[File:Rf achterlicht rev 2,2.pdf]] | ||
this is the component placement drawing as a .PDF : [[File:Componenten opstelling rf backlight rev 2,2.pdf]] | this is the component placement drawing as a .PDF : [[File:Componenten opstelling rf backlight rev 2,2.pdf]] | ||
this is a 3D rendering of the PCB with this component placement, it has not been layed out yet, (no copper traces routed yet). | |||
[[File:Rfbacklight 3D view.png|1000px]] | |||
J1 connects to the manual on switch | |||
J2 connects to the piezo buzzer | |||
J3 connects to the 3V battery | |||
J4 is an optional connection to a commercial 315MHz receiver (for testing). | |||
Revision as of 23:25, 30 January 2018
| Project Radio controlled Bicycle back light | |
|---|---|

| |
| A battery powered bicycle back light that can be used to find your bike. | |
| Status | Initializing |
| Contact | Mahjongg |
| Last Update | 2018-01-30 |
My nephew asked me if I could help him design a school project, a bicycle back light that could be remotely controlled to blink and emit sound.
I engineered a solution around a 315MHz receiver.
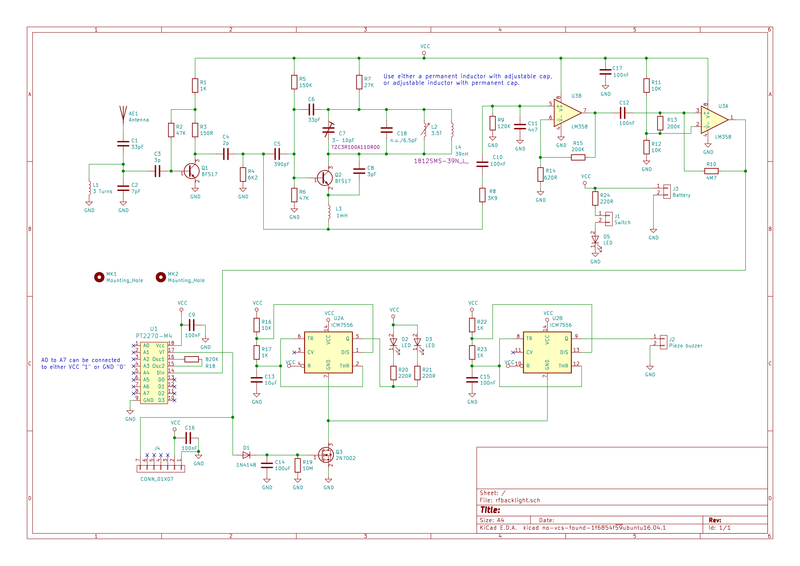
This is the (updated to rev 2.1) schematic.
File:RF Achterlicht rev2.1.pdf

31 January, 2018, made component placement
Also updated the schematic: File:Rf achterlicht rev 2,2.pdf this is the component placement drawing as a .PDF : File:Componenten opstelling rf backlight rev 2,2.pdf
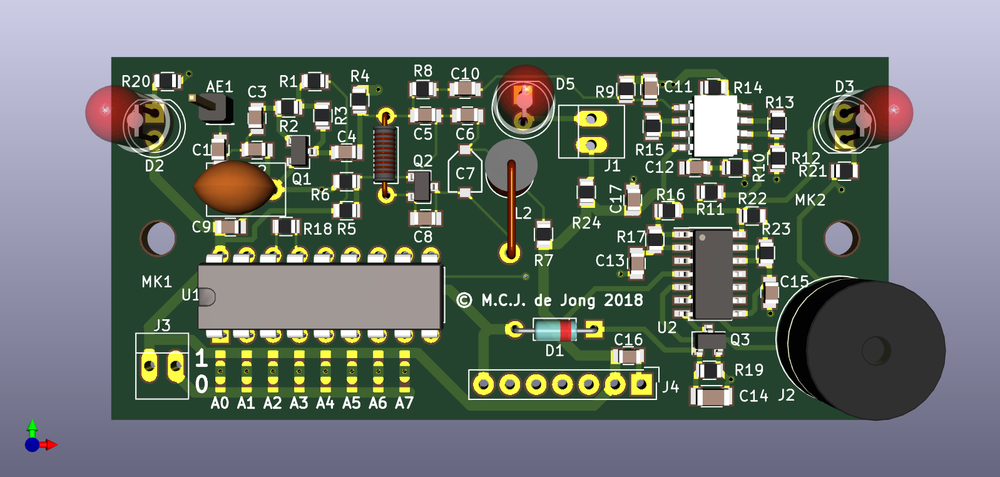
this is a 3D rendering of the PCB with this component placement, it has not been layed out yet, (no copper traces routed yet).

J1 connects to the manual on switch J2 connects to the piezo buzzer J3 connects to the 3V battery J4 is an optional connection to a commercial 315MHz receiver (for testing).