Assembling RhoCoCo: Difference between revisions
No edit summary |
|||
| (16 intermediate revisions by the same user not shown) | |||
| Line 3: | Line 3: | ||
|Picture=IMG 20190328 152503.jpg | |Picture=IMG 20190328 152503.jpg | ||
|Omschrijving=This text describes how to assemble a RhoCoCo home computer from two PCB's, ten (socketed) integrated circuits, a dozen connectors and various other parts. | |Omschrijving=This text describes how to assemble a RhoCoCo home computer from two PCB's, ten (socketed) integrated circuits, a dozen connectors and various other parts. | ||
|Status= | |Status=Completed | ||
|Contact=Mahjongg | |Contact=Mahjongg | ||
}} | }} | ||
| Line 18: | Line 18: | ||
This is the result: [[File:IMG 20190330 205013.jpg|800px]]. | This is the result: [[File:IMG 20190330 205013.jpg|800px]]. | ||
Farnell only delivered 49 keys, not 50, so I left the middle of the three-key spacebar out for now. | Farnell only delivered 49 keys, not 50, so I left the middle of the three-key spacebar out for now. I phoned them, and they will send me the missing switch. | ||
Next up was soldering the SD-card holder, as I was already afraid of, the card holder had two plastic pins, I had designed no holes for in the PCB. The datasheet of the card holder was very fuzzy about these two pins, and I could not determine if they really existed, and exactly where they were located. Easy solution was to cut the pins off. Fortunately all the other (solder) pins I seemed to had placed correctly. | Next up was soldering the SD-card holder, as I was already afraid of, the card holder had two plastic pins, I had designed no holes for in the PCB. The datasheet of the card holder was very fuzzy about these two pins, and I could not determine if they really existed, and exactly where they were located. Easy solution was to cut the pins off. Fortunately all the other (solder) pins I seemed to had placed correctly. | ||
This is the PCB, with only the card reader soldered to it, in the back you can see the component overview drawing, | This is the PCB, with only the card reader soldered to it, in the back you can see the component overview drawing, with R1 marked as placed. | ||
[[File:IMG 20190330 212947.jpg|800px]] | [[File:IMG 20190330 212947.jpg|800px]] | ||
You can also see resistor R1 in this picture, and that it only just fits, with its leads bent straight at the body of the resistor. | You can also see a resistor (R1) in this picture, and that it only just fits, with its leads bent straight at the body of the resistor. All resistors I used were designed with 3/10" pitch, for the smallest possible footprint with classic 1/4Watt resistors. | ||
Then I started soldering the resistors, here you can see the 240 Ohm resistors, before soldering, legs bent outwards a bit to keep them in place for soldering. its best to start with resistors, so you can lay the board flat on its back with resistors being pushed al the way trough the PCB because no higher components are yet placed. That is the reason we always start with the lowest profile parts first. Turn the board so that you have easy access to one row of the pads you want to solder, so that you can put the point of the iron on the pad AND resistor wire, heat for a fraction of a second then apply a minimal amount of solder. Then rotate the board 180 degrees, and do the other row. | |||
[[File:IMG 20190330 213317.jpg|800px]] | [[File:IMG 20190330 213317.jpg|800px]] | ||
After the axial resistors, I did the resistor pack, noting the dot (pin-1 mark) to correspond to the pin-1 mark on the PCB, (the square drawn around a square pad). Then I continued with the diodes. | |||
Diodes are not minimally spaced as bending the leads very close to the glass might break the glass, so hold the diode between thumb and forefinger and fold the wire with the nail of your thumb resting on the wire, just past the glass, Then I did the socket strips for the keyboard, and all IC sockets. Notice the sockets are all oriented the same way, except for U2, the 24LCxx EEPROM, which has its pin-one down, and the LM386 speaker driver which is mounted sideways, so be careful with the orientation of these. | |||
Start soldering sockets by first soldering two opposite corner pins, if you have trouble that the sockets keep falling out while turning the PCB over, use your thumbnail to press sideways on a pin from the solder side while turning the PCB over. If you have cheaper sockets with bendable pins, you can bend two corner pins to keep the socket from falling out. after having soldered two pins turn the board over and check the orientation of the socket, so that the indentation on the socket (showing which end has pin-1) corresponds to the indentation shown on the PCB, placing the IC's in later in the right orientation is crucial, dong it wrong will not only not work, but might damage the part if you power it on while it is inserted backward. | |||
Now hold the PCB in your hand and push the socket down with your thumb, while re-melting the solder on the two corners, this will assure the socket is soldered flush down on the PCB. | |||
now lay the PCB back down and solder all the other pins | |||
So after an evening, I had done all resistors, the resistor pack, diodes, socket strips, and all IC sockets. I soldered the same kind of socket strips that were on the PCB to the end of the connector strips, as the wire ends were too thin to make good contact with the sockets. Luckily I had anticipated this, and bought some extra socket strips for this purpose. | So after an evening, I had done all resistors, the resistor pack, diodes, socket strips, and all IC sockets. I soldered the same kind of socket strips that were on the PCB to the end of the connector strips, as the wire ends were too thin to make good contact with the sockets. Luckily I had anticipated this, and bought some extra socket strips for this purpose. | ||
| Line 36: | Line 46: | ||
[[File:IMG 20190331 005754.jpg|800px]] | [[File:IMG 20190331 005754.jpg|800px]] | ||
== April 2, 2019 received the last remaining parts == | |||
Received a few remaining parts from Mouser, the on-off switches, 74LS670 IC's, and some 20MHz extra Z80's to test how fast Rhococo can go. Also received some subsequent deliveries from farnell, the missing keyboard switch, and the 2x23 pin angled pinheader expansion connector. | |||
[[File:IMG 20190402 114017.jpg|800px]] | |||
== April 3, 2019 Done building the first prototype board! == | |||
Finished the prototype board. | |||
I noticed that the non electrolytic capacitors I bought were not the same pitch as the holes in the PCB, I should change all of them to 2/10" pitch. | |||
I first tried if I had 5V and 3V3, before plugging in any components, all was well, so I plugged in all IC's and tested the voltages again. Still okay, so I let it on for 5 minutes to see if any component became warm. | |||
It seems no dramatic mistakes were made, so far so good. | |||
Here is the newborn computer, in all its glory: | |||
[[File:IMG 20190403 001201.jpg|800px]] | |||
Here you can see it "powered up", with its keyboard attached, note the power LED above the on-off switch top right is burning. Also note that the missing third "spacebar" key is now present. | |||
[[File:IMG 20190403 000550.jpg|800px]] | |||
The friday afterwards, I labeled the keyboard using a brother label printer, with black on transparent strips. | |||
This is how it now looks, | |||
[[File:RHOCOCO with keyboard.jpg|800px]] | |||
After this I will start attempts to bring up (boot) the prototype. I have started a new page on that | |||
[[category:RhoCoCo]] | |||
Latest revision as of 18:12, 9 April 2019
| Project Assembling a RhoCoCo home computer | |
|---|---|
| |
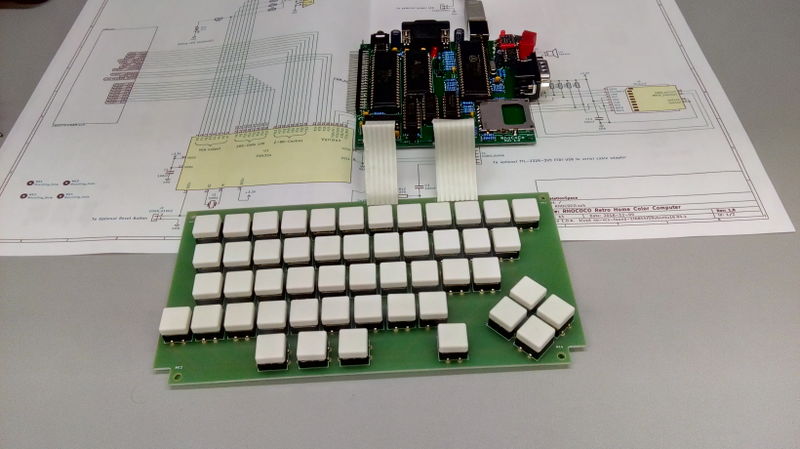
| This text describes how to assemble a RhoCoCo home computer from two PCB's, ten (socketed) integrated circuits, a dozen connectors and various other parts. | |
| Status | Completed |
| Contact | Mahjongg |
| Last Update | 2019-04-09 |
We need, two PCB's, the parts from this list: File:RHOCOCO rev 1.8 assembly list.pdf
a soldering iron, and this assembly drawing to locate each part. File:Rhococo rev 1.8 component overview.pdf
In principle we start by soldering the only SMT part to the PCB, the SD-card-connector, this might have been pre-assembled for you. Then we do the resistors, and the diodes by bending them into shape.
I practice I decided I wanted to build up the keyboard first, but quickly ran up to a problem, all the holes in the keyboard PCB for the keys were too small (smaller than 1mm) to fit the pins of the keys through, and I had to drill all 400 holes with a 1.5mm drill (through a stack of three PCB's). I should have checked if the hole size of this library footprint was correct.
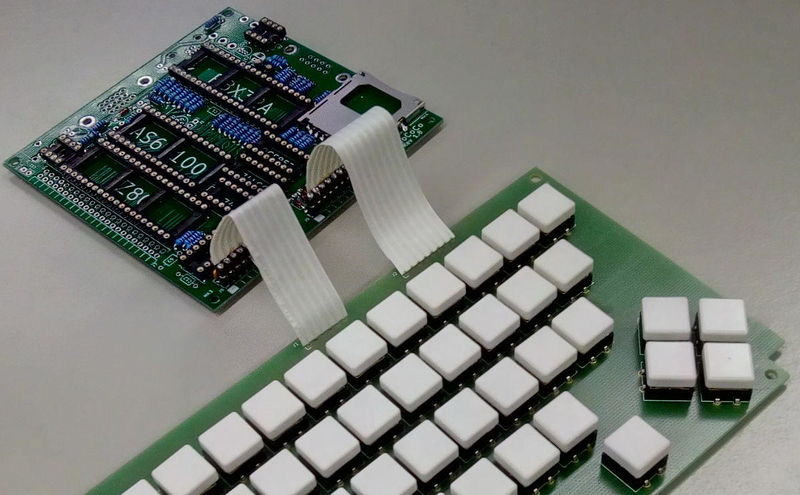
Then I soldered 49 keys, and two connector strips to the PCB's.
This is the result: 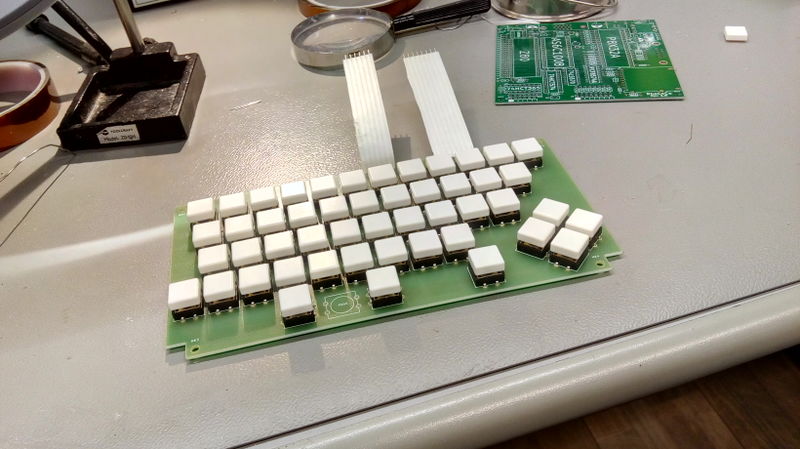 .
.
Farnell only delivered 49 keys, not 50, so I left the middle of the three-key spacebar out for now. I phoned them, and they will send me the missing switch.
Next up was soldering the SD-card holder, as I was already afraid of, the card holder had two plastic pins, I had designed no holes for in the PCB. The datasheet of the card holder was very fuzzy about these two pins, and I could not determine if they really existed, and exactly where they were located. Easy solution was to cut the pins off. Fortunately all the other (solder) pins I seemed to had placed correctly.
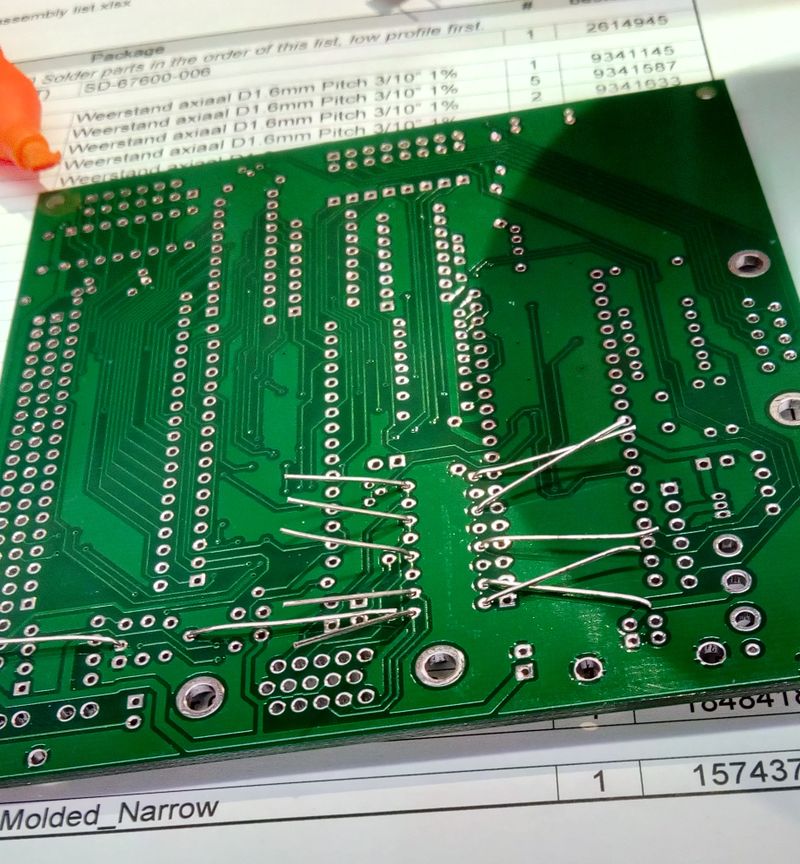
This is the PCB, with only the card reader soldered to it, in the back you can see the component overview drawing, with R1 marked as placed.
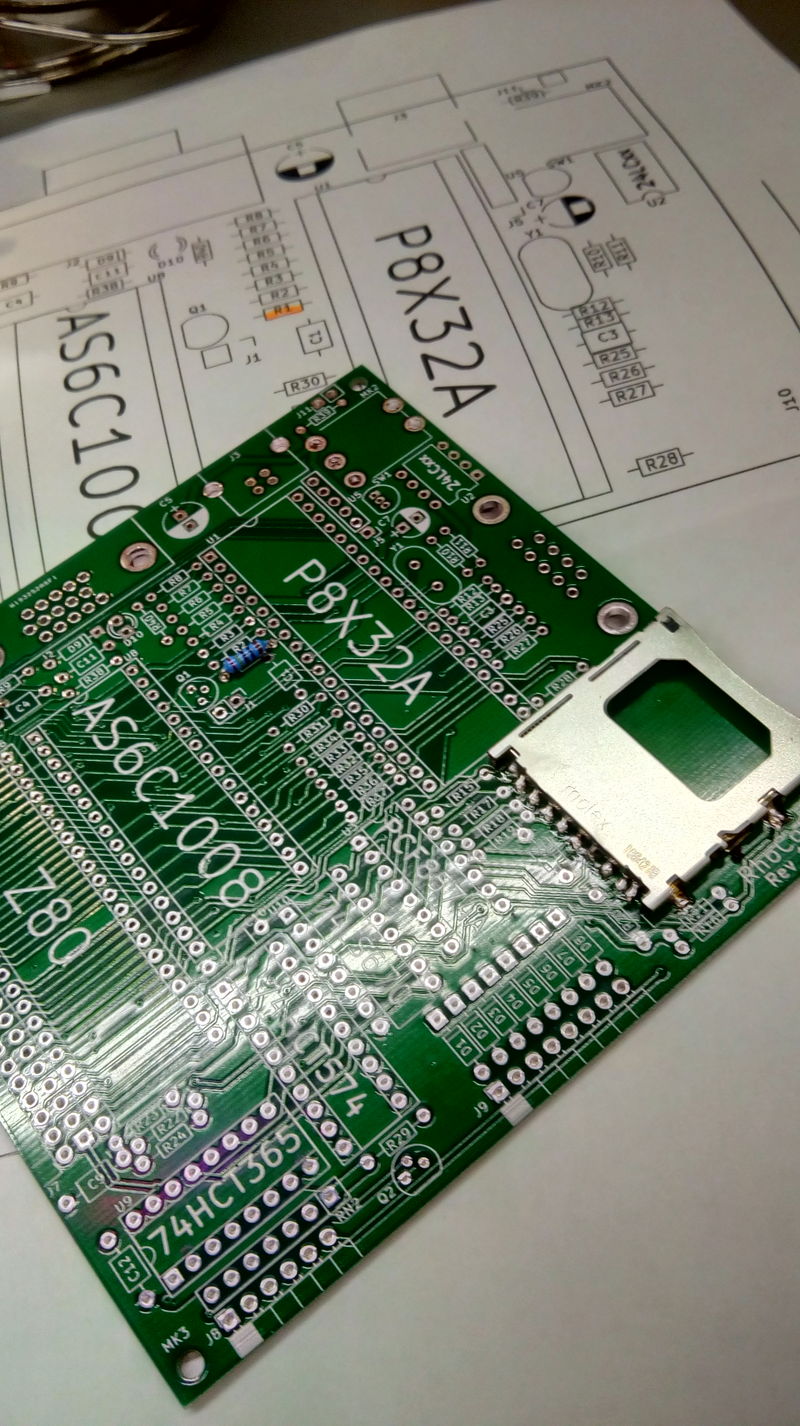
You can also see a resistor (R1) in this picture, and that it only just fits, with its leads bent straight at the body of the resistor. All resistors I used were designed with 3/10" pitch, for the smallest possible footprint with classic 1/4Watt resistors.
Then I started soldering the resistors, here you can see the 240 Ohm resistors, before soldering, legs bent outwards a bit to keep them in place for soldering. its best to start with resistors, so you can lay the board flat on its back with resistors being pushed al the way trough the PCB because no higher components are yet placed. That is the reason we always start with the lowest profile parts first. Turn the board so that you have easy access to one row of the pads you want to solder, so that you can put the point of the iron on the pad AND resistor wire, heat for a fraction of a second then apply a minimal amount of solder. Then rotate the board 180 degrees, and do the other row.
After the axial resistors, I did the resistor pack, noting the dot (pin-1 mark) to correspond to the pin-1 mark on the PCB, (the square drawn around a square pad). Then I continued with the diodes. Diodes are not minimally spaced as bending the leads very close to the glass might break the glass, so hold the diode between thumb and forefinger and fold the wire with the nail of your thumb resting on the wire, just past the glass, Then I did the socket strips for the keyboard, and all IC sockets. Notice the sockets are all oriented the same way, except for U2, the 24LCxx EEPROM, which has its pin-one down, and the LM386 speaker driver which is mounted sideways, so be careful with the orientation of these.
Start soldering sockets by first soldering two opposite corner pins, if you have trouble that the sockets keep falling out while turning the PCB over, use your thumbnail to press sideways on a pin from the solder side while turning the PCB over. If you have cheaper sockets with bendable pins, you can bend two corner pins to keep the socket from falling out. after having soldered two pins turn the board over and check the orientation of the socket, so that the indentation on the socket (showing which end has pin-1) corresponds to the indentation shown on the PCB, placing the IC's in later in the right orientation is crucial, dong it wrong will not only not work, but might damage the part if you power it on while it is inserted backward.
Now hold the PCB in your hand and push the socket down with your thumb, while re-melting the solder on the two corners, this will assure the socket is soldered flush down on the PCB. now lay the PCB back down and solder all the other pins
So after an evening, I had done all resistors, the resistor pack, diodes, socket strips, and all IC sockets. I soldered the same kind of socket strips that were on the PCB to the end of the connector strips, as the wire ends were too thin to make good contact with the sockets. Luckily I had anticipated this, and bought some extra socket strips for this purpose.
I also used to socket strip sockets to create a holder for the crystal, so that I could easily replace the crystal if its frequency has to change.
This is what I had at the end of the evening:
April 2, 2019 received the last remaining parts
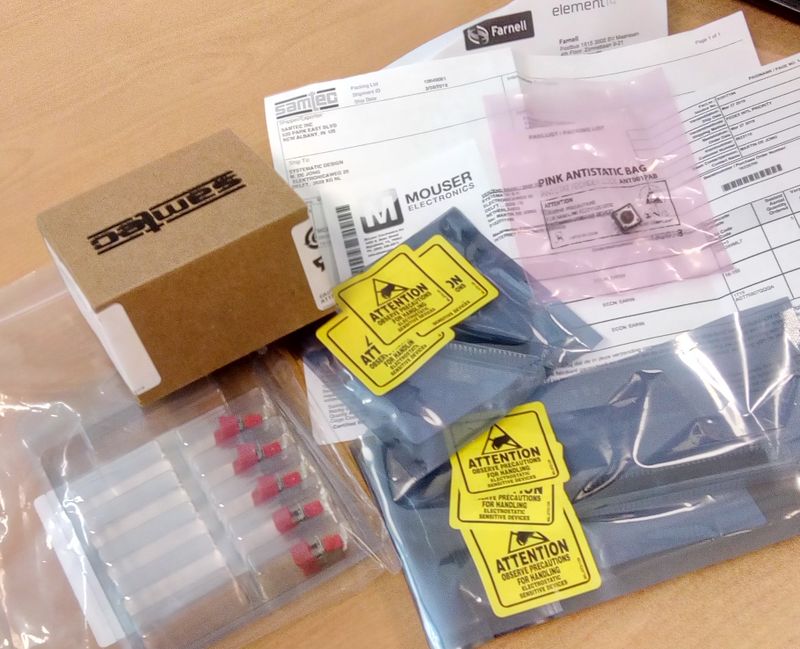
Received a few remaining parts from Mouser, the on-off switches, 74LS670 IC's, and some 20MHz extra Z80's to test how fast Rhococo can go. Also received some subsequent deliveries from farnell, the missing keyboard switch, and the 2x23 pin angled pinheader expansion connector.
April 3, 2019 Done building the first prototype board!
Finished the prototype board.
I noticed that the non electrolytic capacitors I bought were not the same pitch as the holes in the PCB, I should change all of them to 2/10" pitch.
I first tried if I had 5V and 3V3, before plugging in any components, all was well, so I plugged in all IC's and tested the voltages again. Still okay, so I let it on for 5 minutes to see if any component became warm. It seems no dramatic mistakes were made, so far so good.
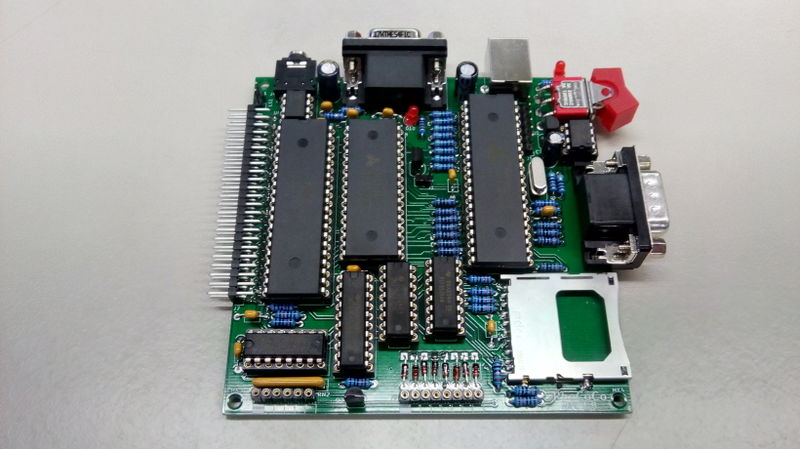
Here is the newborn computer, in all its glory:
Here you can see it "powered up", with its keyboard attached, note the power LED above the on-off switch top right is burning. Also note that the missing third "spacebar" key is now present.
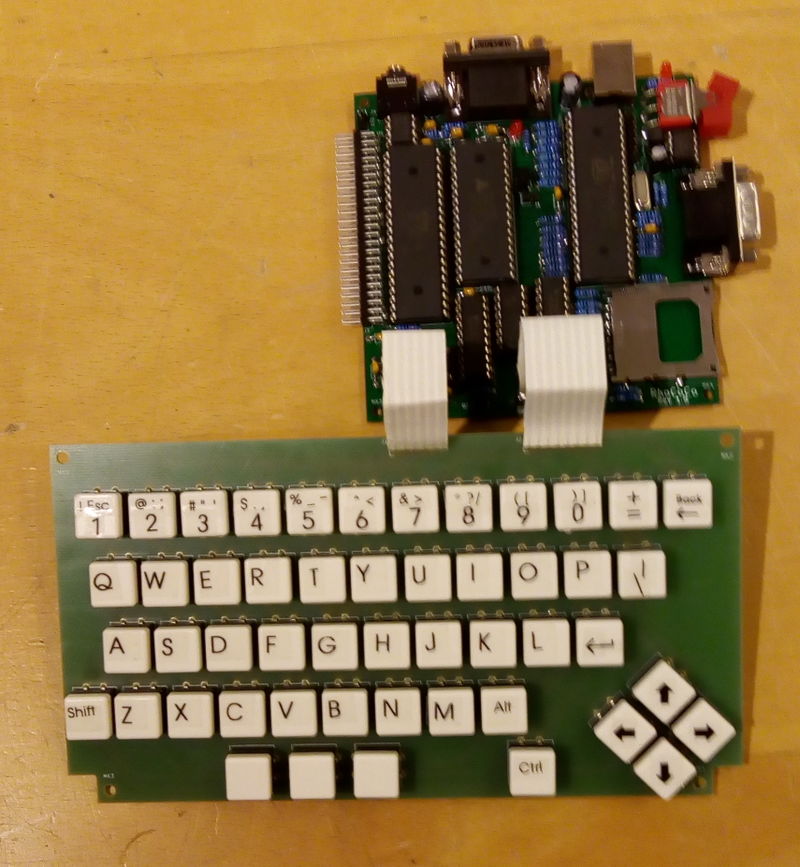
The friday afterwards, I labeled the keyboard using a brother label printer, with black on transparent strips.
This is how it now looks,
After this I will start attempts to bring up (boot) the prototype. I have started a new page on that
