Ledcube: Difference between revisions
m →Logboek |
mNo edit summary |
||
| (8 intermediate revisions by 2 users not shown) | |||
| Line 3: | Line 3: | ||
|Picture=Ledcube-inspiratie.jpeg | |Picture=Ledcube-inspiratie.jpeg | ||
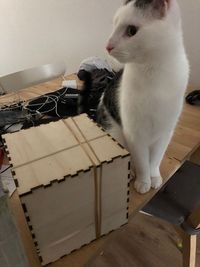
|Omschrijving= Een kubus van ledpanelen. 24.576 pixels! | |Omschrijving= Een kubus van ledpanelen. 24.576 pixels! | ||
|Status= | |Status=Completed | ||
|Contact=Sebastius | |Contact=Sebastius | ||
|Contact1=Polyfloyd | |Contact1=Polyfloyd | ||
| Line 179: | Line 179: | ||
[[File:Ledcube PjdAjASST4yZd0%DoHPC5g.jpg|200px]] | [[File:Ledcube PjdAjASST4yZd0%DoHPC5g.jpg|200px]] | ||
I'm a huge fan of this batterypack. It awes and terrifies me at the same time. Each cell can deliver 10A with ease, so the total pack can do 90A at 3.7V, so well over 300 Watts! So the pack will be treated with care and some respect. | |||
Also a new frame-design is ready to test. This version has a proper compensation for the laser-width so it is a tight squeeze to fit together. The internal frame for the battery and Pi also had a bit of work done. Note that the frame is very much untested, something that will happen in the next few days. I hope to have the cube operating 'stand alone' without a power-umbilical by the weekend. | Also a new frame-design is ready to test. This version has a proper compensation for the laser-width so it is a tight squeeze to fit together. The internal frame for the battery and Pi also had a bit of work done. Note that the frame is very much untested, something that will happen in the next few days. I hope to have the cube operating 'stand alone' without a power-umbilical by the weekend. | ||
[[ | [[File:Ledcube_160mm_4mm_frames_rev3.svg|200px]] [[File:Ledcube 160mm 4mm internal battery.svg|200px]] | ||
=== February 3 2018, one step forward and a step back === | |||
[[File:Ledcube Fullsizeoutput 9a3.jpeg|300px]] | |||
I wanted to start with this beautiful shot of the cube, on its own power. The inside was a mess at this point, bundles of wire going everywhere, but IT WORKS! And it's magical to hold in your hands (also a bit heavy, about 2kg) | |||
After my test I started to wire everything somewhat neatly. Used tons of the Wago 221 series to connect everything. I added three relays to be able to switch the panels and a step-up converter for the Pi. | |||
[[File:Ledcube E9637B05-728E-40D9-9723-AA7EA417F238.jpg|200px]] [[File:JShHeb4TRuazVHfmVWgIg.jpg|200px]] [[File:XoiCmrKqTruzWAJjUNRxXA.jpg|200px]] | |||
[[File:SNrqfLDUShc4RJi6j7KGw.jpg|200px]] [[File:ZrbdOYLZRAmucfXHRaYNxg.jpg|200px]] [[File:T5PUHnGTR2d817Kk8VQ.jpg|200px]] | |||
I'm not really happy with the current situation. The step-up is burning hot (AKA: causing heat and being not really efficient with my battery), the relays draw constant power. Also, the frame isn't as tight-fitting anymore, assembling and disassembling been frustrating with stuff falling apart or being pushed out by cabling. So back to the drawingboard for another iteration... | |||
I ordered every cheap step-up board from AliExpress i could find, so i can do some tests on heat, efficiency and stability. | |||
=== Februari 10 2018, Stand Up! === | |||
Cut a nice little stand for the cube based on some Rubiks Cube stands i saw. Those were designed for 3D printing, i made one with the laser. | |||
This test was made of painted 3mm MDF. Sanded the edges at an angle so they match up and cut a triangle base. Applied liberal amounts of hotglue. | |||
I'll need to buy some plexiglass to make it transparant. | |||
[[File:Ledcube GQNVaxBSmCWw4v20VigbA.jpg|200px]] [[File:Beeld-13-02-2018-09-41-23.png|200px]] | |||
=== Februari 17 2018, Softwarez === | |||
<!-- Yeah yeah, I'll contribute to this documentation :D --> | |||
(polyfloyd) I've written a small article about the software used to render the animations, you can read it here: https://polyfloyd.net/post/opengl-shaders-ledcube/ | |||
Latest revision as of 19:08, 16 April 2024
| Project Ledcube | |
|---|---|
| |
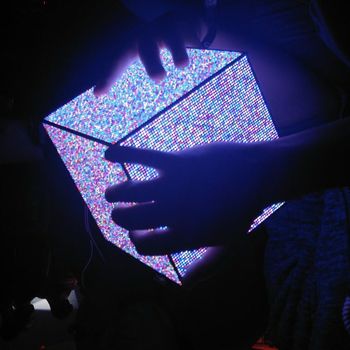
| Een kubus van ledpanelen. 24.576 pixels! | |
| Status | Completed |
| Contact | Sebastius, Polyfloyd, Boekenwuurm |
| Last Update | 2024-04-16 |
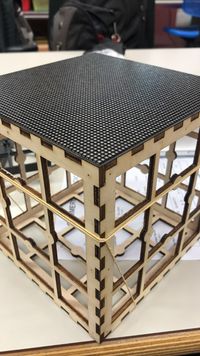
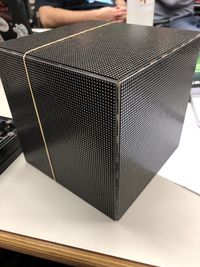
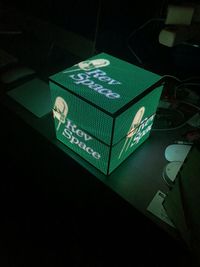
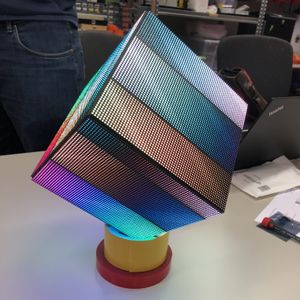
We gaan kubussen maken met heel veel ledjes! Geïnspireerd door wat we zagen op 34C3 zijn we van plan drie kubussen te bouwen, elk met 6 x 64x64 pixels. 24.576 RGB pixels! Er zijn nog wat puzzels op te lossen qua software en stroomvoorziening.
Materialen
- 6x Hub75 compatible paneeltjes, 16x16cm, P2.5, 64x64 pixels RGB
- 1x http://www.electrodragon.com/product/rgb-matrix-panel-drive-board-raspberry-pi/
- 1x Raspberry Pi 3
- 9x Samsung INR18650-35E 3450mAh - 10A
- 3x 1s 15A BMS/protection bordje
- 1x 5v boost converter
- 1m 16p Flatcable
- 12x 16p IDC connectoren
- 2x WAGO 221-415 lasklemmen
En vast nog veel meer :)
Tekeningen
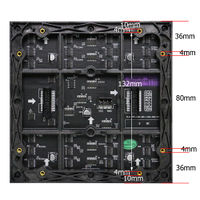
- Ledpaneel van achter gezien met dimensies: Media:Ledcube P25.jpg
- Flightcase voor de ledcube: Media:Flightcase ledcube.svg
- Maatje groter Media:LEDcube_Flightcase175mm.svg
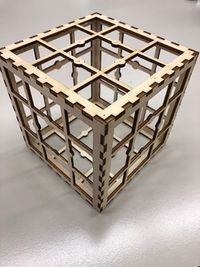
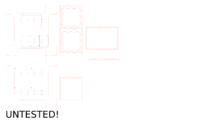
- Ledcube frame (UNTESTED!):
Software
- Ledcat: https://github.com/polyfloyd/ledcat
- RPi-RGB Led Matrix: https://github.com/hzeller/rpi-rgb-led-matrix
Logboek
6 januari 2018: Concept testing
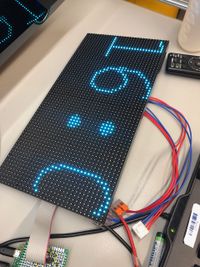
(Sebastius) Ik had in een opwelling al eerder dit soort panelen gekocht. 2x 64x32 pixels. Vandaag met een adaptertje aan de Pi gehangen en met Ledcat getest. Werkte direct! Wel wegens waarschijnlijk een rare updatefrequentie of te traag GPIO gebruik een nare flikkering in beeld. Kan vast nog opgelost worden.
7 januari 2018: Concept testing
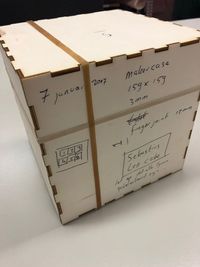
(Sebastius) Vandaag met andere software een ledpaneel getest. Op https://github.com/hzeller/rpi-rgb-led-matrix staat prima software om voorlopig mee voort te kunnen tot LedCat zover is. Ook een doosje gesneden om de formfactor te ervaren en de stevigheid van het hout te voelen. Het idee is dat de paneeltjes nog opengewerkt worden (anders passen de componenten op de achterzijde van de ledpanelen niet). Tot slot de bestelling geplaatst voor 18 ledpaneeltjes via AliBaba ($380) en voor aansluitprintjes op de Pi: http://www.electrodragon.com/product/rgb-matrix-panel-drive-board-raspberry-pi/
8 januari 2018: Bestellen
(Sebastius) De ledboards zijn betaald en hopelijk met 7 dagen in huis. Ook AliExpress afgestruind voor 16p IDC connectoren, flatcable, gyroscoop en BMS bordjes. Geen idee nog hoe we de accu gaan doen maar er zal iets van bescherming op moeten.
Tekening ontvangen van de leverancier:
10 januari 2018: Tekenen!
(Sebastius) De ledboards zijn verscheept met DHL!
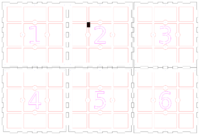
Tevens mezelf uitgesloofd met Inkscape op basis van wat aannames over de afmetingen (de tekening vanuit China klopt her en der niet):
Blauw, Rood en Zwart worden uitgesneden.
11 januari 2018: Lasercut prototype
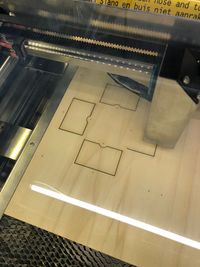
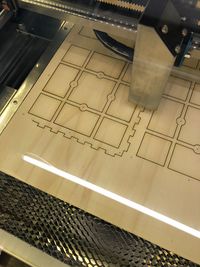
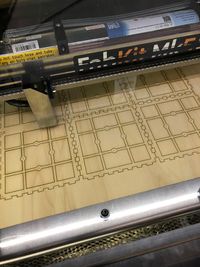
(Sebastius) Met de lasercutter het prototype uitgesneden. Het 4mm multiplex van de Karwei gesneden met 40% power en 30mm feedrate. Kwam er nét niet doorheen. Volgende keer met meer vermogen of met een lagere snelheid.
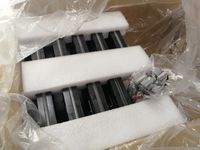
12 januari 2018: Binnen! First blink!
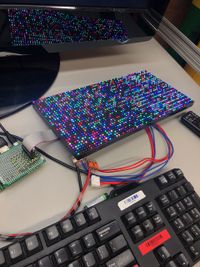
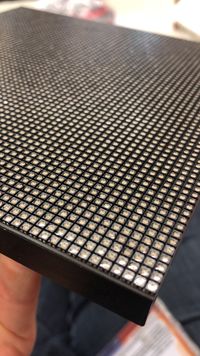
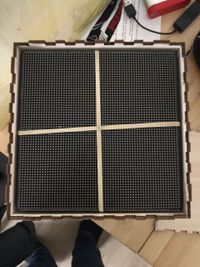
(Sebastius) Vandaag met Kartoffel de zending opgehaald! Wat een mooie paneeltjes. De pixeldichtheid is enorm hoog. De panelen zijn via de achterkant geschroefd, wat een kleine aanpassing in het plan gaat vereisen tzt.
Uiteraard meteen de panelen op het prototype frame gezet. Een Pi3 geleend en bedraad.
Uiteindelijk met de demosoftware Game of Life aangezet: Video op Youtube
Het frame past al best goed, hoewel een aantal gaten 'uit het lood' zijn.
Daarom nieuwe tekeningen gemaakt, dit keer een flightcase en een nieuw frame met betere positie van de boorgaten.
13 januari 2018: Software, first loop
(Sebastius) Deze dag staat in het teken van de software. Ik heb nog niet het lef echt zelf te programmeren maar ik kan een aantal dingen wel. De kubus start nu bij boot een bash scriptje dat oneindig blijft loopen met een aantal effectjes zoals wat plaatjes tonen en Game of Life draaien. Ook laat het zijn IP adres zien zodat je via SSH er bij kunt.
Verder ontdekt dat de panelen niet RGB maar RBG zijn. Ook geleerd hoe ik een bashscriptje maak met een loop, hoe ik een scriptje stop (control z en/of kill $pid) en het script start als SystemD opstartscript.
Het ip adres zet ik om naar een plaatje om te tonen in de cyclus met onderstaande code:
#!/bin/bash

ip addr show wlan0 | perl -lane'next if $F[0] !~ /inet/; next if /temporary|tmpaddr/; next if not /scope global/; print $F[1]' | xargs -I '{}' convert -size 64x64 -background black -fill green -pointsize 10 -font Helvetica label:'{}' /home/pi/cube/ipadress.png

/home/pi/cube/led-image-viewer --led-rows=64 --led-chain=12 --led-rgb-sequence=RBG -l 1 -w 5 /home/pi/cube/ipadress.png
Daarnaast heb ik een simpel cycle.sh scriptje geschreven:
#!/bin/bash
while true
do
	/home/pi/cube/iptonen.sh
	/home/pi/cube/demo --led-rows=64 --led-chain=12 --led-pwm-bits=11 --led-show-refresh --led-slowdown-gpio=1 --led-pwm-lsb-nanoseconds 50 -t 10 --led-brightness=50 --led-rgb-sequence RBG -D2 /home/pi/cube/nyancat.ppm
	/home/pi/cube/demo --led-rows=64 --led-chain=12 --led-pwm-bits=11 --led-show-refresh --led-slowdown-gpio=1 --led-pwm-lsb-nanoseconds 50 -t 20 --led-brightness=50 --led-rgb-sequence RBG -D7
	/home/pi/cube/demo --led-rows=64 --led-chain=12 --led-pwm-bits=11 --led-show-refresh --led-slowdown-gpio=1 --led-pwm-lsb-nanoseconds 50 -t 10 --led-brightness=50 --led-rgb-sequence RBG -D2 /home/pi/cube/hackalot.ppm
	/home/pi/cube/demo --led-rows=64 --led-chain=12 --led-pwm-bits=11 --led-show-refresh --led-slowdown-gpio=1 --led-pwm-lsb-nanoseconds 50 -t 20 --led-brightness=50 --led-rgb-sequence RBG -D10 -m 0
	/home/pi/cube/demo --led-rows=64 --led-chain=12 --led-pwm-bits=11 --led-show-refresh --led-slowdown-gpio=1 --led-pwm-lsb-nanoseconds 50 -t 10 --led-brightness=50 --led-rgb-sequence RBG -D2 /home/pi/cube/revspace.ppm
	/home/pi/cube/demo --led-rows=64 --led-chain=12 --led-pwm-bits=11 --led-show-refresh --led-slowdown-gpio=1 --led-pwm-lsb-nanoseconds 50 -t 20 --led-brightness=50 --led-rgb-sequence RBG -D9
	/home/pi/cube/led-image-viewer --led-rows=64 --led-chain=12 --led-rgb-sequence=RBG -l 2 /home/pi/cube/*.gif
done
Het cycle-script start ik met een systemd service:
[Unit]
Description=Start Cube cycle

[Service]
Type=oneshot
ExecStart=/home/pi/cube/cycle.sh

[Install]
WantedBy=multi-user.target
Dit plaats je in /etc/systemd/system/cycle.service
En als je dat gedaan hebt enable je de service met sudo systemctl enable cycle.service en je kunt de service starten met sudo systemctl start cycle.service .
De flightcase past en werkt prima voor de eerste paar keer heen en weer slepen. Een volgende iteratie heeft handvatten oid nodig.
De cube heeft ook kort gedraaid op de Mux Powerbank. Dat werkt nét (tot je teveel wit/gemengde kleuren gebruikt). Dat gaf wel even een puinhoop binnen maar er is dus royaal genoeg ruimte.
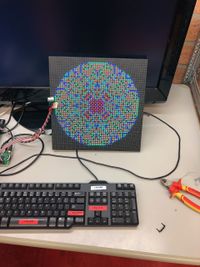
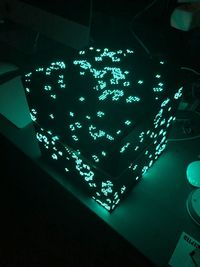
In het donker gerommeld met plaatjes en democode. Indrukwekkend zonder er heel veel aan gedaan te hebben:
14 januari 2018, Unixbaardspul (Bash scripting voor beginners)
(Sebastius) Vandaag Boekenwuurm geholpen met laseren van een frame en het testen van haar panelen. Tevens verder gespeeld met scripts. Het volgende scriptje haalt een random NASA gifje van Giphy.com af...
curl "http://api.giphy.com/v1/gifs/random?tag=nasa&api_key=APIKEY" | json_pp | grep fixed_height_small_url | cut -d \" -f 4 | xargs -I '{}' wget '{}'
Ook een duurtestje gedaan met de Mux Powerbank. De 4 cellen waren zeker niet vol en hielden het 3 uur uit. Werd wel erg warm in het doosje.
21 januari 2018, Nieuw frame en accupack
(Sebastius) Een paar dagen niet gelogd maar wel geklust aan de kubus. Met name aan de softwarekant: ik probeer Game of LIfe goed te laten lopen over het hele kubusoppervlak. Dat je dus rondom gliders rond kunt hebben vliegen. Helaas is het niet zo simpel en heb ik nog een hoop te leren op het gebied van C++.
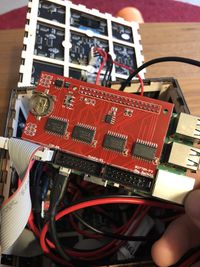
Met de post kwam vandaag het printje om op de Pi drie ketens aan ledpanelen aan te sturen. Kost bijna niks, er zitten levelshifters op en het is veel netter dan de dupontdraadjes van eerst.
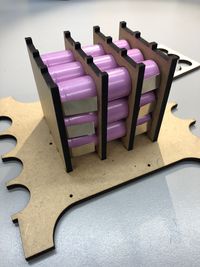
Vandaag bezig geweest met een nieuw frame. Dit keer uit 4mm MDF voor meer vorm-vastheid. De tekeningen anagepast om een tweetal platen in het midden toe te voegen als frame voor de Raspberry Pi en de accupack. Deze heb ik ook alvast gelast. Ik heb gekozen voorlopig om 3 sets van 3 cellen elk in parallel te zetten. Het wordt dus een 1S9P pack. Waanzinnig natuurlijk, in theorie zou je het pack met 90A kunnen belasten!
Het accupack komt precies in het midden van de kubus om de balans in tact te houden.
Inkscape is een waar avontuur als je wilt ontwerpen. Sommige features zijn enorm handig maar er missen best nog wat mogelijkheden om goed uit te lijnen en te dimensioneren.
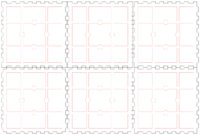
Het nieuwe frame heeft nog geen compensatie voor de kerf van de laser gehad. Zonde, want nu valt het heel makkelijk uit elkaar. De volgende versie zal iets strakker moeten passen als het goed verlijmbaar moet zijn.
27 januari 2018, this was a triumph
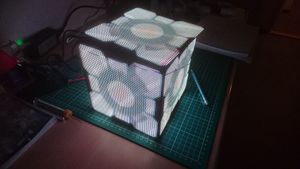
(Boekenwuurm) Omdat mijn kubus nu ook in elkaar zit, kan ook ik met plaatjes beginnen, zoals een companion cube. Verder heb ik gekeken naar mappings, zodat verschillende kubusen met verschillende manieren van aansluiten op dezelfde manier hun beeld laten zien.
De rpi-led-matrix library lijkt hiervoor wel mogenlijkheden te hebben, maar alleen met 180 graden roteren. Dat is handig als je van een hoop panelen een groot scherm wilt maken en de panelen zijn in een U-vorm op zijn kant georienteerd, maar niet direct voor een kubus bestaande uit twee strengen van panelen zoals we de kubus hier maken. De makkelijkste oplossing is om al met het vastschroeven van de panelen op het frame na te denken over richting en bedrading van de panelen. Ik ben nog niet uit over de beste volgorde van aansluiten van de twee strengen. Tot die tijd houd ik het bij ontwerpen die niet afhankelijk zijn van richting ;-)
30 januari 2018, making something dangerous
(Sebastius)Since the LEDcube is drawing in lots of international fans, i'll try making my logs in English. Not my native tongue, but it should be superior to Google Translate ;).
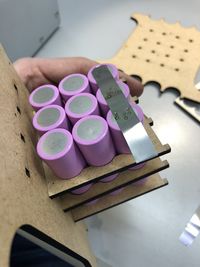
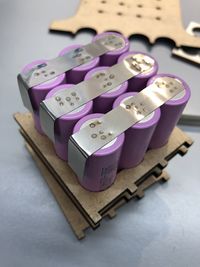
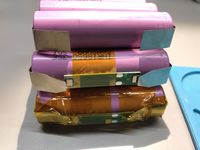
Today i've added protection-boards to the batterypacks. Although the seller claims these go up to 15Amps, i really doubt it. Mux is expecting them to burn at around 8 amps. So i've added three to lighten the load. Each board will probably carry the load of about max 4 amps with ease. Pictured below are the three 1S3P packs in various stages of completion. The final pack will be a 1S9P pack for now. I'll hook the panels up to the batterypower without a booster. Might cause glitches (need to test) but it saves a lot of heat and efficiency without up/down converting the voltage.
I'm a huge fan of this batterypack. It awes and terrifies me at the same time. Each cell can deliver 10A with ease, so the total pack can do 90A at 3.7V, so well over 300 Watts! So the pack will be treated with care and some respect.
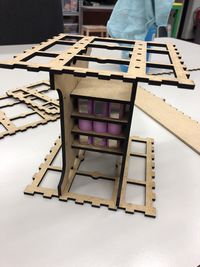
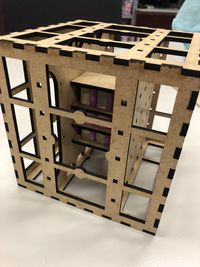
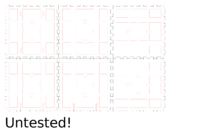
Also a new frame-design is ready to test. This version has a proper compensation for the laser-width so it is a tight squeeze to fit together. The internal frame for the battery and Pi also had a bit of work done. Note that the frame is very much untested, something that will happen in the next few days. I hope to have the cube operating 'stand alone' without a power-umbilical by the weekend.
February 3 2018, one step forward and a step back
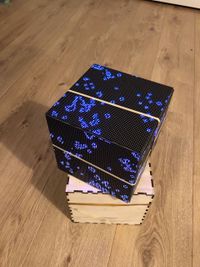
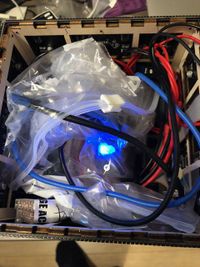
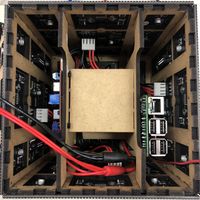
I wanted to start with this beautiful shot of the cube, on its own power. The inside was a mess at this point, bundles of wire going everywhere, but IT WORKS! And it's magical to hold in your hands (also a bit heavy, about 2kg)
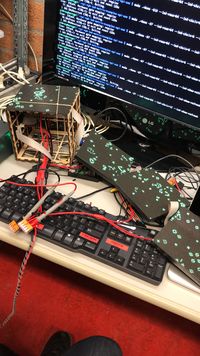
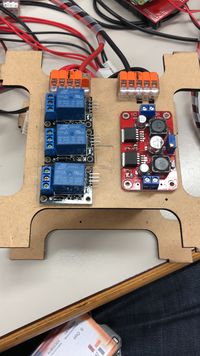
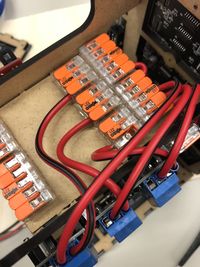
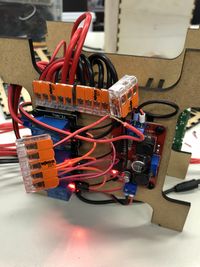
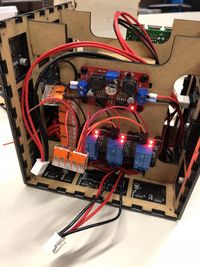
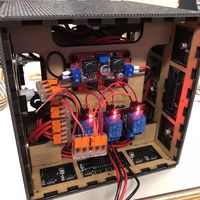
After my test I started to wire everything somewhat neatly. Used tons of the Wago 221 series to connect everything. I added three relays to be able to switch the panels and a step-up converter for the Pi.
I'm not really happy with the current situation. The step-up is burning hot (AKA: causing heat and being not really efficient with my battery), the relays draw constant power. Also, the frame isn't as tight-fitting anymore, assembling and disassembling been frustrating with stuff falling apart or being pushed out by cabling. So back to the drawingboard for another iteration...
I ordered every cheap step-up board from AliExpress i could find, so i can do some tests on heat, efficiency and stability.
Februari 10 2018, Stand Up!
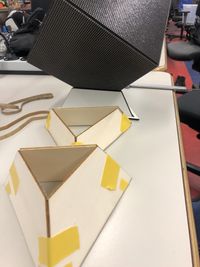
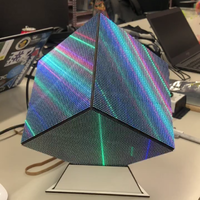
Cut a nice little stand for the cube based on some Rubiks Cube stands i saw. Those were designed for 3D printing, i made one with the laser.
This test was made of painted 3mm MDF. Sanded the edges at an angle so they match up and cut a triangle base. Applied liberal amounts of hotglue.
I'll need to buy some plexiglass to make it transparant.
Februari 17 2018, Softwarez
(polyfloyd) I've written a small article about the software used to render the animations, you can read it here: https://polyfloyd.net/post/opengl-shaders-ledcube/
