OpenEPaperLink
| Project OpenEPaperLink | |
|---|---|

| |
| Gathering info to make getting started with OpenEPaperLink easier. | |
| Status | Initializing |
| Contact | Wheeze_NL |
| Last Update | 2024-12-23 |
This is just a Wheeze_NL braindump for now, it might help you get started
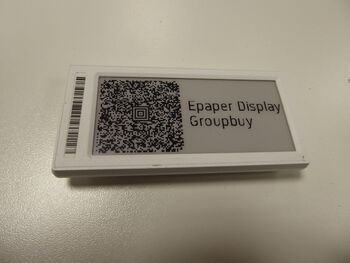
There is a very nice project, reusing epaper pricetags from grocery-shops etc.
The project is called OpenEPaperLink and was kickstarted by dmitri.gr who reversed engineered the firmware and created a new open-source firmware for Solum pricetags.
A lot of work was also done by Atc1441 (I need to check if I remembered this correctly, and who else has added a lot to the project)
All the information I am trying to make easier to grasp here for beginners, is based on this project, not the original firmware or usage.
The Access Point (AP)
General info
The access point (AP) usually consists of an ESP32-S2 or ESP32-S3 and second unit like the ESP32-C6.
The first ESP32 connects to the wifi, the second unit "talks" to the displays over a zigbee-like protocol on 2.4Ghz (channel can be auto or selected, probably not exactly the wifi-channels, tbd.)
The ESP32-S2 can handle about 30 tags, the ESP32-S3 can handle a few hundred. If you have many tags, disable preview in the web interface to save data.
The simplest AP is a ESP32 with a display as an AP, this has limited coverage due to shitty internal antennas in the tags.
Many AP's have a tag or another little display for showing the status of the AP such as IP address and connected tags.
Some AP's have an interface to connect a Flashing-jig, for flashing the tags.
There are also bluetooth tags and sub-ghz, some of the AP's can handle these as well. I have not played with these, or done any investigation.
Out of the box
Hook up the USB-cable to your PC. As usual with ESP32 devices, a serial port should appear (insert Pokemon reference, the port might no be wild though)
Your AP device is probably already flashed, but I found that openepaperlink.de not only handles the flashing, but also setting the wifi-credentials in a nice web-ui (web-serial)
When you have set your wifi, you can connect to the IP of the AP with your webbrowser of choice and start configuring!
The first tag you'll see, is usually the display/tag of the AP itself.
Displays (Tags)
General
Random info
- The smaller displays could last a decade when updated twice per day in good RF (radio) conditions.
How to start
On receiving ready-flashed displays, they will be in deep sleep.
To start the display, short the terminals by turning the batteries over. If you just pull the batteries out, the internal processor will probably keep running on the energy in the capacitor alone, as it barely uses energy in deep sleep.
When putting in the batteries, it is recommended to put them on the lid, and push them in together with the lid. If you put them in one by one, there is a big chance of bouncing which results in improper startup of the processor.
Now the display starts to work
(Details on exact inner workings are on the github page of the project!) https://github.com/OpenEPaperLink/OpenEPaperLink/wiki/RF-protocol
After turning the displays on, basically the next events happen:
- The tag looks for an AP, and registers it's availability.
- The AP tells the display when to check in.
After you have set an image (or something that generates an image through the web-ui of the AP) the following events take place.
- When the tag checks in with the AP, to see if there is new content available.
- The AP responds that there is a new image.
- The tag requests the blocks of information.
- The AP transmits those
- If the tag doesn't fully receive some, it wil re-request those blocks.
- After fully receiving all the information, the tag confirms reception to the AP
- The AP tells the tag when to check in again, based on the settings in the AP. This can be in 40 seconds, 1 hour, or a few options in between. (I will add the specific options later)
- The AP updates the preview in the web UI
If there is no new content:
- The AP just tells the tag when to check in again, based on the settings in the AP.
How to show stuff?!?!
The easy start
Go to the AP web ui, left-click the tag you want to change, and check the options that exist in the default firmware such as weather and date/time.
There is an advanced section at the bottom to do things like putting the tag to "permanent" deep sleep (until you reset it) or clear a waiting image for a tag.
What works for me so far
What I have found to work (through the wiki) is POST-ing an image of the correct size through HTTP. Info on https://github.com/OpenEPaperLink/OpenEPaperLink/wiki/Image-upload The size of the display and the mac-address can be found in the web-ui.
A web-socket
I am trying to figure out how to get the information from the AP. It should be available, as it is seen in the Home Assistant plugin...
Info seems to be available via a websocket on ws://{host}/ws
Info about the tags shows up here when the tag checks in.
Home Assistant
There is a HACS plugin for Home Assistant, which makes it possible to control the AP and tags through HA automation and such.
Links
Main wiki:
https://github.com/OpenEPaperLink/OpenEPaperLink
List of most AP's
https://github.com/OpenEPaperLink/OpenEPaperLink/wiki/Building-an-Access-Point