Deurbedieningspaneel: Difference between revisions
Created page with " {{Project |Name=Deurbedieningspaneel |Status=In progress |Contact=Raymii }} This page describes the process used to get a very simple arduino program which can b..." |
No edit summary |
||
| Line 27: | Line 27: | ||
With the help of Juerd and Hans I found out that connectors 4 & 5 got a connection when the “Openen” button was pressed. | With the help of Juerd and Hans I found out that connectors 4 & 5 got a connection when the “Openen” button was pressed. | ||
There always is a connection on the connectors 2 and 6, except for when the “Sluiten” button is pressed. This is called a | There always is a connection on the connectors 2 and 6, except for when the “Sluiten” button is pressed. This is called a Normally Closed Circuit | ||
The key part was a bit more troublesome. A lot of wires were connected to one another, and a few more gave a connection when the key is used. The special key can only turn 45 degrees to the left, so there is only one state to monitor. | The key part was a bit more troublesome. A lot of wires were connected to one another, and a few more gave a connection when the key is used. The special key can only turn 45 degrees to the left, so there is only one state to monitor. | ||
Latest revision as of 15:15, 30 March 2014
| Project Deurbedieningspaneel | |
|---|---|
| Status | In progress |
| Contact | Raymii |
| Last Update | 2014-03-30 |
This page describes the process used to get a very simple arduino program which can be used to find out if a button is pressed on a train door control panel or if the key for the panel is used.
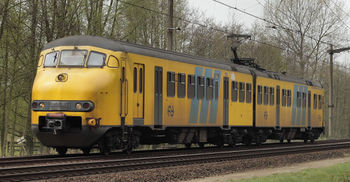
I acquired a door control panel from a demolition yard out of a Plan V (Mat 64) train.
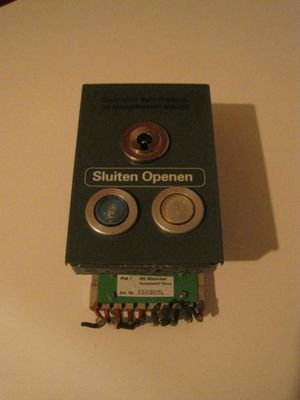
I wanted to find out via an arduino if a button was pressed or if the special key was used. This was my first arduino project.
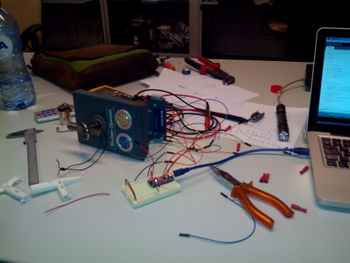
The above image shows my workspace. It includes the panel, a breadboard, an arduino nano, the key, a few 3d printed keys and some tools. Also some papers and a fused arduino.
The back of the panel has 10 semi-wire connectors. I took a multimeter and started to find out which connectors had an electrical connection when none of the buttons were pressed. (doorpiepen)
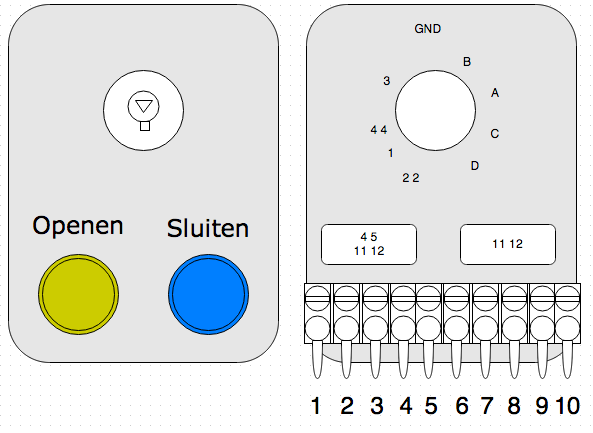
The above, very professional, drawing shows a schematic of the front and back side of the panel. The numbers are actually there on the wires in the panel.
With the help of Juerd and Hans I found out that connectors 4 & 5 got a connection when the “Openen” button was pressed.
There always is a connection on the connectors 2 and 6, except for when the “Sluiten” button is pressed. This is called a Normally Closed Circuit
The key part was a bit more troublesome. A lot of wires were connected to one another, and a few more gave a connection when the key is used. The special key can only turn 45 degrees to the left, so there is only one state to monitor.
After some time it seemed that connectors one and three gave a connection when the key was turned. I now had all the states I wanted to monitor.
Time to hook up an arduino.
I started with the openen button. I hooked up a wire to connector 4 on the panel and to pin D4 on the Arduino Nano. Another wire went to connector 5 on the panel and to the GND on the arduino. The following code was used to print out the state of the button:
int openPin = 4;

void setup() {
  Serial.begin(9600);
  pinMode(openPin, INPUT);
}
void loop() {
    int openButtonState = digitalRead(openPin);
    Serial.println(openButtonState);
    delay(500);
}
However, this printed out random results, instead of the 1 or 0 for the state of the button.
After a lecture from Juerd about power and the concept of Pull-up and Pull-down resistors, plus the fact that the arduino includes a built in pull-up resistor I changed the code to this:
int openPin = 4;

void setup() {
  Serial.begin(9600);
  pinMode(openPin, INPUT);
  digitalWrite(openPin, HIGH);
}
void loop() {
    int openButtonState = digitalRead(openPin);
    Serial.println(openButtonState);
    delay(500);
}
The digitalWrite(openPin, HIGH); turns the Pull-up resistor functionality on for that pin.
Now I got better results from the arduino. When the Openen button was pressed, it printed out 0, which is exactly what we want.
The “Sluiten” knop was a different story. Pins 2 and 6 are always connected, unless the button is pressed. This is a “Normally Closed” circuit (wiki). Since the arduino has no built in Pull-down we need to build one on the breadboard. I used a 100KΩ resistor for this. The resistor was plugged in to the breadboard from arduino D2 to GND. A wire from arduino D2 went to connector 2 on the panel and a wire went from 5V on the arduino to connector 6 on the panel.
For the keying part I thought that it would be the same as for the Openen button. When the key is turned connector 1 & 3 on the panel had a connection. I hooked them up to pin D8 on the arduino and to GND. The code had evoled a bit to show the state a bit more verbose, like so:
int sleutelPin = 8;
void setup() {
  Serial.begin(9600);
  pinMode(sleutelPin, INPUT);
  digitalWrite(sleutelPin, HIGH);
}
void loop() {
  int sleutelState = digitalRead(sleutelPin);

  if (sleutelState == 0) {
    Serial.println("Gesleuteld");
    Serial.println("   ");
    delay(200);
  }
However, when I used the key the power LED on the arduino went out. When the key was turned back the led went back on. After trying this a few times the arduino stoped working. Hans pointed out to me that I fused the arduino. I do not know why these pins fused the arduino, however, they did.
I grabbed a new arduino from the vending machine and started beeping with the multimeter for another combination of connectors which triggered when the key was used. Turns out, 9 and 10 did. So again, one wire was hooked up to pin D8 on the arduino and one to the GND.
This worked, except for it also triggering the Sluiten button. I also don’t know why, but I changed the Sluiten code to check if the key is not being used:
  if (closeButtonState == 0) {
    if (sleutelState == 1) {
      // ingedrukt
      Serial.println("Sluiten ingedrukt");
      Serial.println("   ");
      digitalWrite(led, HIGH);
      delay(200);
    }
  }
This allows me to reliably measure the three states.
Here is a picture of the wiring drawn in Fritzing:
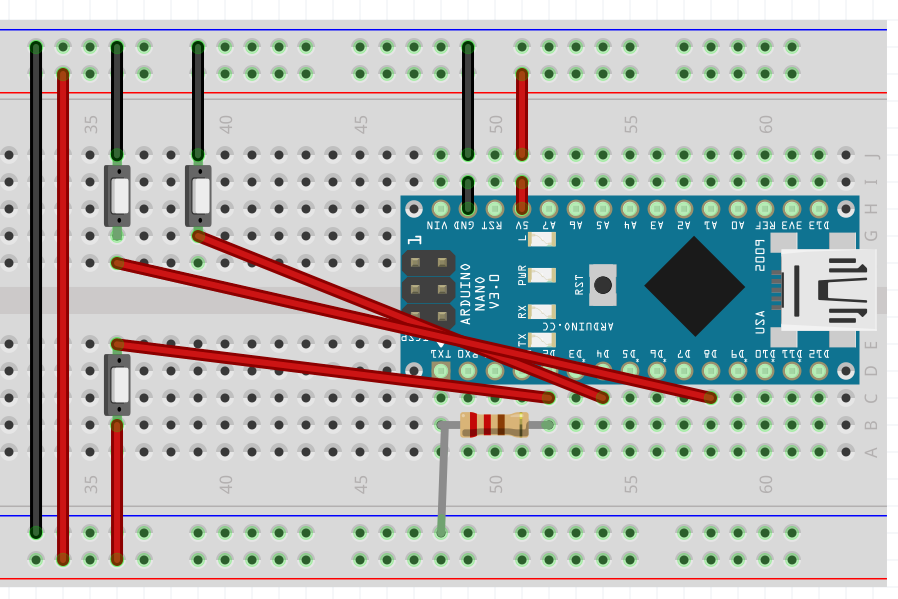
The buttons from the panel are on the breadboard there.
The end result in the arduino serial monitor:
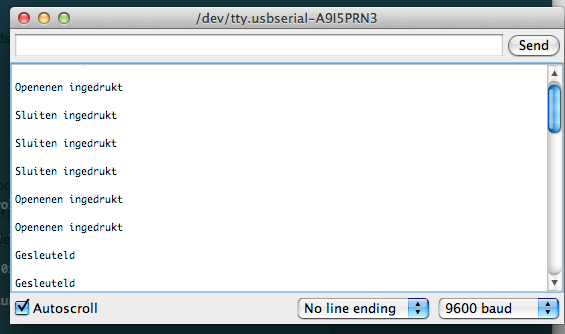
Plus the LED on the Arduino Nano which turns on when an action is done.
Overall this was a very educational experience. I’m still looking for a purpose for the panel, however, I’m sure that will come.
The code:
// sluiten == 2 & 6, 6 == 5v, 2 == D2. D2 == ook 100 Kh Ohm weerstand naar ground.
// Openen == 4 & 5, 5 == ground, 4 == D4
// sleutelen == 9 & 10, 9 == D8, 10 == ground (niet in 1 & 3 doen want dan kortsluiting)
//
int openPin = 4;
int closePin = 2;
int sleutelPin = 8;
int led = 13;

void setup() {

  Serial.begin(9600);

  pinMode(closePin, INPUT);
  pinMode(openPin, INPUT);
  pinMode(sleutelPin, INPUT);
  // make pull up for openPin and sleutelPin
  digitalWrite(openPin, HIGH);
  digitalWrite(sleutelPin, HIGH);
  pinMode(led, OUTPUT);
}

void loop() {
  digitalWrite(led, LOW);

  int openButtonState = digitalRead(openPin);
  int closeButtonState = digitalRead(closePin);
  int sleutelState = digitalRead(sleutelPin);

    if (closeButtonState == 0) {
    if (sleutelState == 1) {
      // ingedrukt
      Serial.println("Sluiten ingedrukt");
      Serial.println("   ");
      digitalWrite(led, HIGH);
      delay(200);
    }
  }

  if (openButtonState == 0) {
    // ingedrukt
    Serial.println("Openenen ingedrukt");
    Serial.println("   ");
    digitalWrite(led, HIGH);
    delay(200);
  }

  if (sleutelState == 0) {
    Serial.println("Gesleuteld");
    Serial.println("   ");
    digitalWrite(led, HIGH);
    delay(200);
  }

  digitalWrite(led, LOW);
  delay(100);

}