HH2020 programming jigs: Difference between revisions
mNo edit summary |
mNo edit summary |
||
| (4 intermediate revisions by the same user not shown) | |||
| Line 3: | Line 3: | ||
|Picture=IMG_5123.jpeg | |Picture=IMG_5123.jpeg | ||
|Omschrijving=Building board specific programming jigs. | |Omschrijving=Building board specific programming jigs. | ||
|Status= | |Status=Completed | ||
|Contact=Sebastius | |Contact=Sebastius | ||
}} | }} | ||
Made a few simple programming jigs for the HackerHotel2020 badge. It hasn't got a mounted USB or other port, so pogo-pins are needed for fast and simple connections. | Made a few simple programming jigs for the HackerHotel2020 badge. It hasn't got a mounted USB or other port, so pogo-pins are needed for fast and simple connections. | ||
Export | Export Copper layer from Kicad as SVG, use Inkscape strip it down to board outline and holes, use holes as guides on where to place circles in Inkscape. Add some more stuff you want cut or engraved and you're done. | ||
4 layers of hardboard, lasercut. It's the same drawing, just different layers each time. Stackup as follows: | 4 layers of hardboard, lasercut. It's the same drawing, just different layers each time. Stackup as follows: | ||
| Line 17: | Line 17: | ||
*Bottom plate has no holes for the pogo pins, just holes for the M3 screws 30mm and the zipties. | *Bottom plate has no holes for the pogo pins, just holes for the M3 screws 30mm and the zipties. | ||
Pogopins are inserted, soldered on. Lots of M3 nuts are used in the process of making the stack. Top two plates are glued together, bottom two are held together by additional M3 nuts. | Pogopins are inserted, then wires soldered on. They stay in place because the holes are just small enough to have a nice press-fit. Lots of M3 nuts are used in the process of making the stack. Top two plates are glued together, bottom two are held together by additional M3 nuts. | ||
Colorscheme (untested, do not use unless verified!): | Colorscheme (untested, do not use unless verified!): | ||
| Line 34: | Line 34: | ||
* Black - 3.3v | * Black - 3.3v | ||
[[File:Hh2020 jig test.svg|400px|thumb|Jig drawing]] | [[File:Hh2020 jig test.svg|400px|thumb|Original jig drawing]] | ||
[[File:hh2020_jig.svg|Jig drawing everything nicely organised]] | |||
<gallery> | <gallery> | ||
| Line 41: | Line 43: | ||
File:IMG_5121.jpeg | File:IMG_5121.jpeg | ||
File:IMG_5123.jpeg | File:IMG_5123.jpeg | ||
File:IMG_5137.jpeg | |||
File:IMG_5141.jpeg | |||
File:IMG_5142.jpeg | |||
File:IMG_5143.jpeg | |||
File:IMG_5144.jpeg | |||
File:IMG_5146.jpeg | |||
</gallery> | </gallery> | ||
Latest revision as of 17:21, 24 February 2020
| Project Programming Jigs for HH2020 Badge | |
|---|---|
| |
| Building board specific programming jigs. | |
| Status | Completed |
| Contact | Sebastius |
| Last Update | 2020-02-24 |
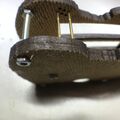
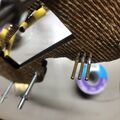
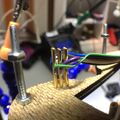
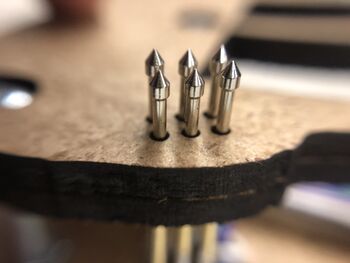
Made a few simple programming jigs for the HackerHotel2020 badge. It hasn't got a mounted USB or other port, so pogo-pins are needed for fast and simple connections.
Export Copper layer from Kicad as SVG, use Inkscape strip it down to board outline and holes, use holes as guides on where to place circles in Inkscape. Add some more stuff you want cut or engraved and you're done.
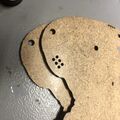
4 layers of hardboard, lasercut. It's the same drawing, just different layers each time. Stackup as follows:
- Top plate has engraving, batterybox cutout, holes for pogos, and holes for the M3 screw heads.
- Second plate has batterybox cutout, holes for pogos and holes for M3 screws.
- Third plate has holes for pogos and holes for M3 screws and zipties.
- Bottom plate has no holes for the pogo pins, just holes for the M3 screws 30mm and the zipties.
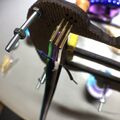
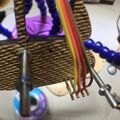
Pogopins are inserted, then wires soldered on. They stay in place because the holes are just small enough to have a nice press-fit. Lots of M3 nuts are used in the process of making the stack. Top two plates are glued together, bottom two are held together by additional M3 nuts.
Colorscheme (untested, do not use unless verified!):
- Brown - VPP
- Red - IN
- Orange - OUT
- Yellow - GND
- Green - RX
- Blue - TX
- Purple - SCL
- Grey - SDA
- White - GND
- Black - 3.3v


