Cyanotypes: Difference between revisions
No edit summary |
No edit summary |
||
| (One intermediate revision by the same user not shown) | |||
| Line 14: | Line 14: | ||
2. Add 10 ml of water | 2. Add 10 ml of water | ||
3. Add 10 ml of 0.2g/ml Ferric Ammonium Citrate solution (found in a brown amber glass bottle in | All steps below should take place in the darkroom or in places with little UV light | ||
3. Add 10 ml of 0.2g/ml Ferric Ammonium Citrate solution (found in a brown amber glass bottle in chemical cabinet 3) | |||
4. Stir this mixture with a disposable pipette | 4. Stir this mixture with a disposable pipette | ||
| Line 41: | Line 43: | ||
* If you don't have a brush one labeled "Cyanotype" should be found in the darkroom | * If you don't have a brush one labeled "Cyanotype" should be found in the darkroom | ||
* There is a box of old transparency sheets in the box marked "Kantoor Suplies" these can be drawn on but are NOT laser printer safe! | * There is a box of old transparency sheets in the box marked "Kantoor Suplies" these can be drawn on but are NOT laser printer safe! | ||
* The chemicals used in this process do not have major health and environmental hazard so they can all be flushed down the drain with lots of water and the paper and glassware can be washed in the darkroom sink | |||
Latest revision as of 14:11, 1 August 2018
| Project Cyanotypes | |
|---|---|

| |
| Status | In progress |
| Contact | PeterC |
| Last Update | 2018-08-01 |
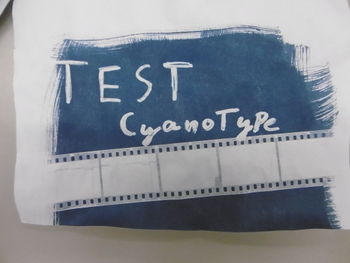
Now you too can make cyanotypes from the comfort of the space.
Instructions for making cyanotypes:
1. Take a beaker and add to it 1.4 g of potassium ferricyanide (located in chemical cabinet 2)
2. Add 10 ml of water
All steps below should take place in the darkroom or in places with little UV light
3. Add 10 ml of 0.2g/ml Ferric Ammonium Citrate solution (found in a brown amber glass bottle in chemical cabinet 3)
4. Stir this mixture with a disposable pipette
5. Pour one disposable pipette full (about 2.5-3 ml) of the mixture from the beaker on the sheet of paper you're going to use (4ml is good for a light coat about one sheet of a4 paper)
6. Set the paper to dry in the darkroom
7. When the paper has dried take whatever you wish to expose on it an place it on the coated side of the paper and cover with a glass sheet
8. Expose (to sunlight or the UV exposure unit on the shelf above the free stuff table)
9. Place the exposed paper in a developing dish full of water and wash until the water turns an orange color then pour the water out and wash 1-3 more times
10. Dry Paper
11. Don't forget to clean up!
Tips:
- The cyanotype mixture and paper is sensitive to UV light, this means you can quickly coat paper under the bulbs in the darkroom as they don't give off a ton of UV but should definitely turn them off when the paper is drying
- Cut off a few strips of paper to test different exposures (and remember to write the time and method of exposure such as "5 min bright sun" on the back of the test strip sheets before you put them in the water bath
- Don't get the cyanotype mixture on your clothes as it can cause staining (there is an apron in the cabinet under the fume hood if you wish to use it)
- These chemicals are relatively safe but you may wish to wear gloves when washing the prints (a box of large nitrile gloves can be found in the darkroom)
- Watercolor paper works best for cyanotypes but if you don't have any printer paper can be used for proof of concept work
- If you don't have a brush one labeled "Cyanotype" should be found in the darkroom
- There is a box of old transparency sheets in the box marked "Kantoor Suplies" these can be drawn on but are NOT laser printer safe!
- The chemicals used in this process do not have major health and environmental hazard so they can all be flushed down the drain with lots of water and the paper and glassware can be washed in the darkroom sink