Facehugger: Difference between revisions
No edit summary |
No edit summary |
||
| (7 intermediate revisions by the same user not shown) | |||
| Line 1: | Line 1: | ||
{{Project | {{Project | ||
|Name=Facehugger | |Name=Facehugger | ||
|Picture= | |Picture=Project1.jpg | ||
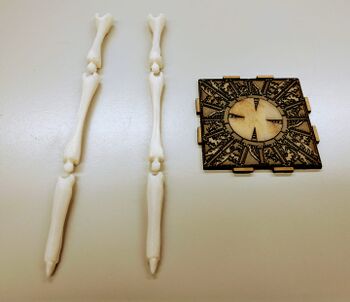
|Omschrijving=This is a 3D printing project for a lifesize facehugger | |Omschrijving=This is a 3D printing project for a lifesize facehugger | ||
|Status=In progress | |Status=In progress | ||
|Contact=Damnlie | |Contact=Damnlie | ||
}} | }} | ||
The original project you can find in Thingiverse: https://www.thingiverse.com/thing:1116392 | The original project you can find in Thingiverse: https://www.thingiverse.com/thing:1116392 | ||
This is a diary about printing this project and a thing what I learn about 3d printing and models so expect a lot of pics and explanation. | This is a diary about printing this project and a thing what I learn about 3d printing and models so expect a lot of pics and explanation. | ||
==== Day 1 ==== | |||
Printed 2 legs out of the 8 that it has. As you can see it prints the bones in two-part and you have to glue them together which will create a line that will be visible if someone would look at it closely. I found a video about this problem link it [https://www.youtube.com/watch?v=YBps-j3dHW0 here]. | |||
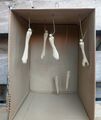
Lesson learned here because the painting should have come after applying the wood filling and sanding it down. I used a primer from [https://www.sceneryworkshop.nl/skeleton-bone-colour-primer-cp3012.html?utm_source=GoogleShopping&utm_medium=cpc&utm_campaign=Verf%2FThe%20Army%20Painter%2FThe%20Army%20Painter%20Primers&utm_content=The%20Army%20Painter&gclid=CjwKCAjw-e2EBhAhEiwAJI5jgwAtelogt_VVwDNesLHtDtxFOXtPjw-RmAMDHXEZYLxei--HmWdxuRoCHzMQAvD_BwE Army Painter the skeleton color one]. It looks like a scary little haunted house. Forums said to leave it drying for around 15-30 minutes depending on ventilation, I left it for an hour outside. | |||
<gallery> | |||
Project2.jpg|Applied skeleton primer | |||
Project3.jpg|After putting them together nice and snuggly as my friend would say "I would not say it's nice'" (meaning its cool but scary) :) | |||
</gallery> | |||
Latest revision as of 10:57, 13 May 2021
| Project Facehugger | |
|---|---|

| |
| This is a 3D printing project for a lifesize facehugger | |
| Status | In progress |
| Contact | Damnlie |
| Last Update | 2021-05-13 |
The original project you can find in Thingiverse: https://www.thingiverse.com/thing:1116392
This is a diary about printing this project and a thing what I learn about 3d printing and models so expect a lot of pics and explanation.
Day 1
Printed 2 legs out of the 8 that it has. As you can see it prints the bones in two-part and you have to glue them together which will create a line that will be visible if someone would look at it closely. I found a video about this problem link it here. Lesson learned here because the painting should have come after applying the wood filling and sanding it down. I used a primer from Army Painter the skeleton color one. It looks like a scary little haunted house. Forums said to leave it drying for around 15-30 minutes depending on ventilation, I left it for an hour outside.
-
Applied skeleton primer
-
After putting them together nice and snuggly as my friend would say "I would not say it's nice'" (meaning its cool but scary) :)

